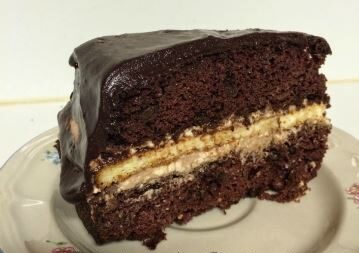
Cheesecake is an all-time favorite dessert for myself and my sweet husband, I think we passed that love on to our children, because they are always requesting cheesecake. I have an old not-so-healthy cheesecake recipe that was my favorite. One day I experimented with it and found I could tweak it to fit the Trim Healthy Mama lifestyle. I had some reservations because cheesecake ingredients are expensive. However, with a little know-how, patience, and prayer, it was a success.
It has been a long while since I posted this recipe and I have added a few updates, and I definitely wanted to share our newest changes. I hope you enjoy this low carb, sugar free, chocolate peanut butter cheesecake that is sure to please even the pickiest child or husband.
Chocolate Peanut Butter Cheesecake – THM S
CRUST
- 2 tbsp softened, unsalted grassfed butter (I prefer Kerrygold) (or coconut oil for dairy free)
- 1/2 cup non-GMO almond flour
- Non-toxic parchment paper
If you’d like to use a water bath to cook the cheesecake, you can as it cooks more evenly. It is, however, extra effort and steps that aren’t crucial but do make a difference (water bath instructions: Line a springform pan with several layers of aluminum foil. Do not skip this step. You’ll be using a water bath to cook the cheesecake. I’ve purchased many springform pans and they all leak.
If not using a water bath, the other option would simply be to generously grease a round springform pan that is at least 8 in by 3 in. Melt butter and pour into pan. Sprinkle in nuts and mix well with the butter. Pat it all down evenly along the bottom of the pan to make the crust.
FILLING
- 4 8-oz packages cream cheese, softened (or 4 8oz dairy free cream cheese like Kite Hill or 2 DF cream cheese and 12 oz coconut yogurt)
- 1/2 cup heavy whipping cream from grassfed cows (or dairy free cream)
- 4 tbsp + 2 tsp Sweet Blend Erythritol & Stevia Blend
- 4 pasture raised large eggs, lightly beaten
- Grated zest of 1 lemon
- Grated zest of 1 orange
- 1 teaspoon pure vanilla extract
- 1/2 cup Lily’s Dark Chocolate Premium Baking Chips or use a chopper to chop a bar of Lily’s baker’s chocolate or Bake Believe Chocolate into chunks
Preheat oven to 325 degrees. Using a stand mixer, beat cream cheese, cream, and Sweet Blend until smooth. Add eggs, and beat well. Then mix in vanilla and zests of lemon and orange. Gently pour onto crust. Put pan inside a large roasting pan. Put pan in the oven, and carefully add enough water to the roasting pan to come two-thirds up the side of the cake pan. *Optional: For more of a peanut butter flavor, you could add 2 T of peanut butter to the filling. We opted not to since some of us wanted more of a traditional cheesecake flavor.
Ovens may vary a little, but it usually bakes in about 2 hours, but just check to see if it’s firm. You may want to check it after about 1-1.5 hours to be sure that the top is not browning. If it is, you can simply and gently lay a piece of aluminum foil over the top, especially if you are not going to top the cheesecake. Once the cheesecake is done, turn the oven off, but leave the cheesecake in the oven until completely cooled.
TOPPING
1/2 cup Lily’s Dark Chocolate Premium Baking Chips
3 tbsp grassfed heavy whipping cream
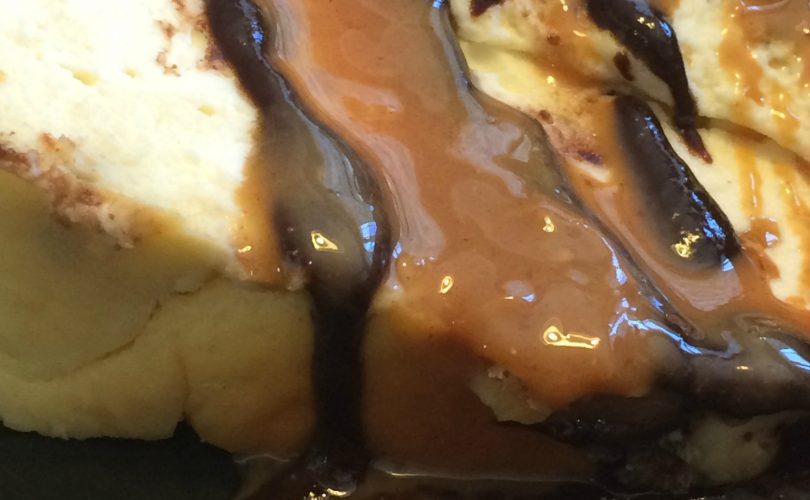
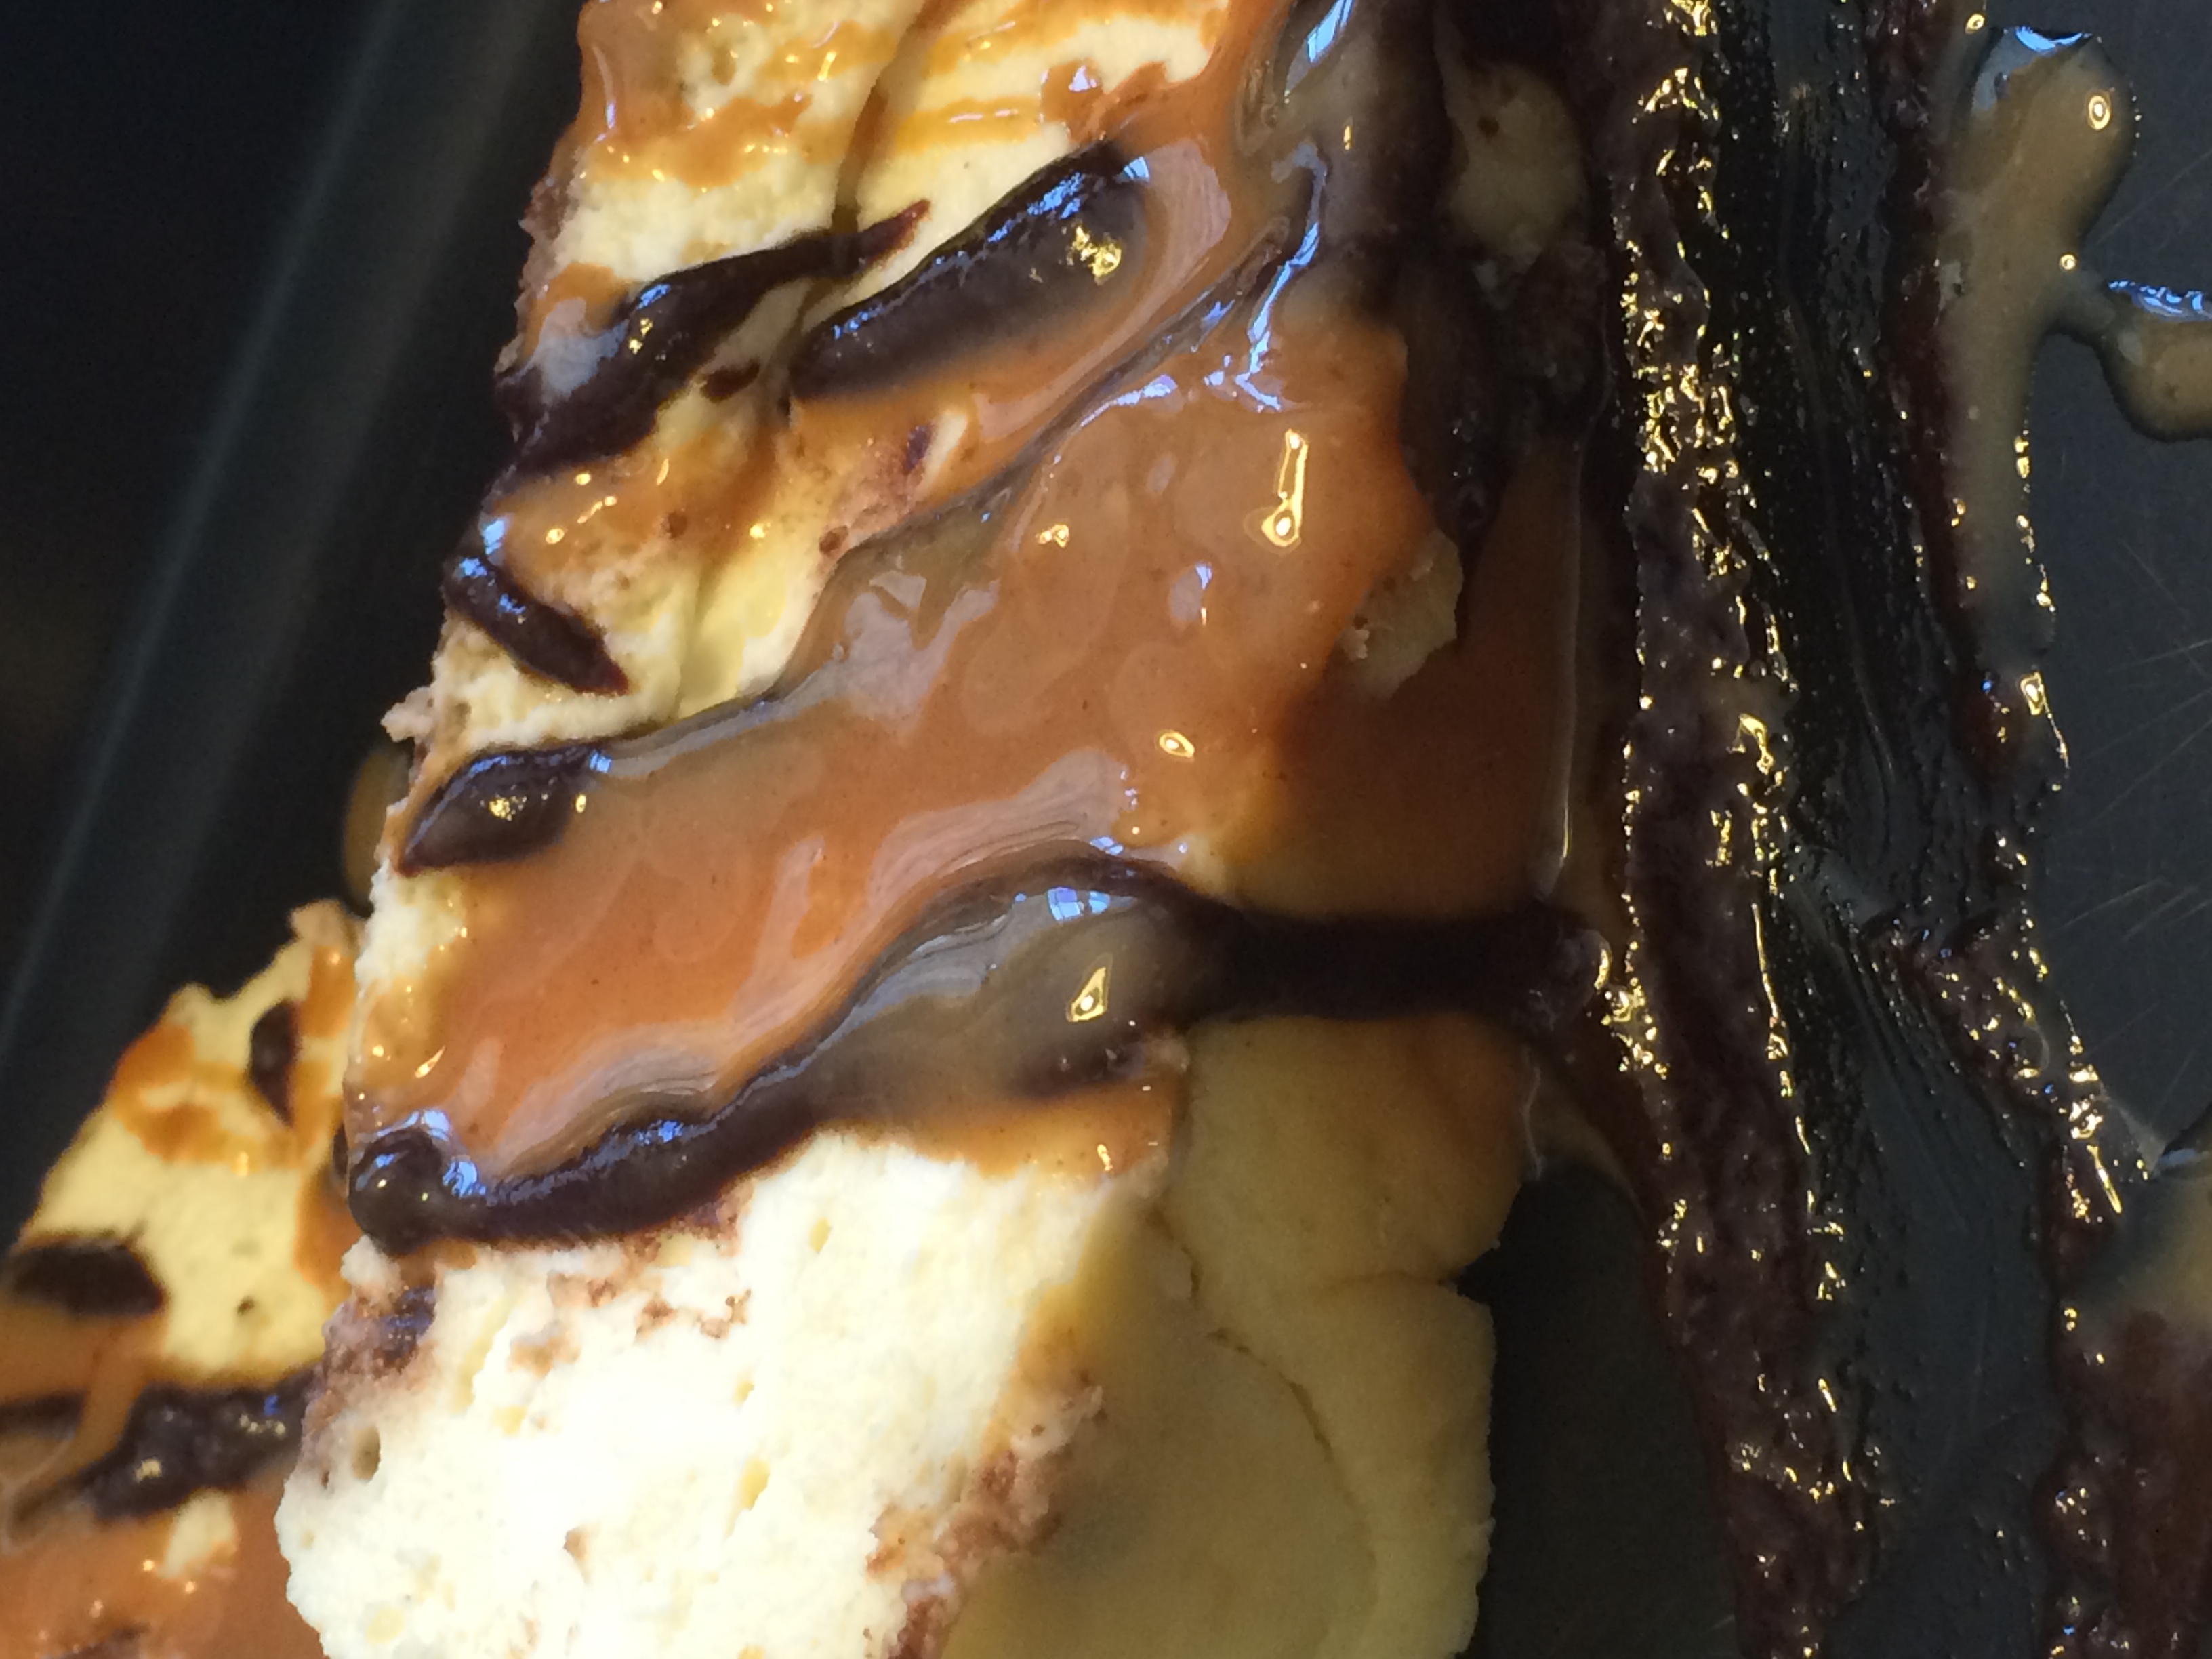
You can choose how much topping you’d like on the cheesecake. We actually cut ours first and then drizzled topping over each piece so we could have some without topping, but you could just drizzle it over the top of the entire cheesecake. Melt chocolate chips in the microwave for about 20 seconds at a time until completely melted. Whisk in whipping cream adding additional if needed to make the consistency of the chocolate easy to pour. Drizzle over the cheesecake.
1/4 cup Natural Creamy Peanut Butter (sugar free)
1 tbsp grassfed heavy whipping cream
1/32 tsp Pure Stevia
Stir peanut butter well being sure to incorporate oil because it separates. Whisk in heavy whipping cream to a consistency that is thicker like ganache, but still loose enough to slowly pour. Drizzle over cheesecake and chocolate. Store cheesecake in refrigerator until ready to serve.
If you’d like to make a simple cheesecake, this one is amazing without the chocolate chips in the filling and without the topping.
Enjoy!!
Amanda